
How to Add a Row to a Data Table in Zoom Docs
In this article
This guide will show you how to add a new row to an existing data table within Zoom Docs. This is useful for expanding your data sets and adding new entries.
Explore more Zoom tutorials with interactive Saltfish walkthroughs.
Here's how to add a row to a data table in Zoom
- Navigate to Zoom Docs
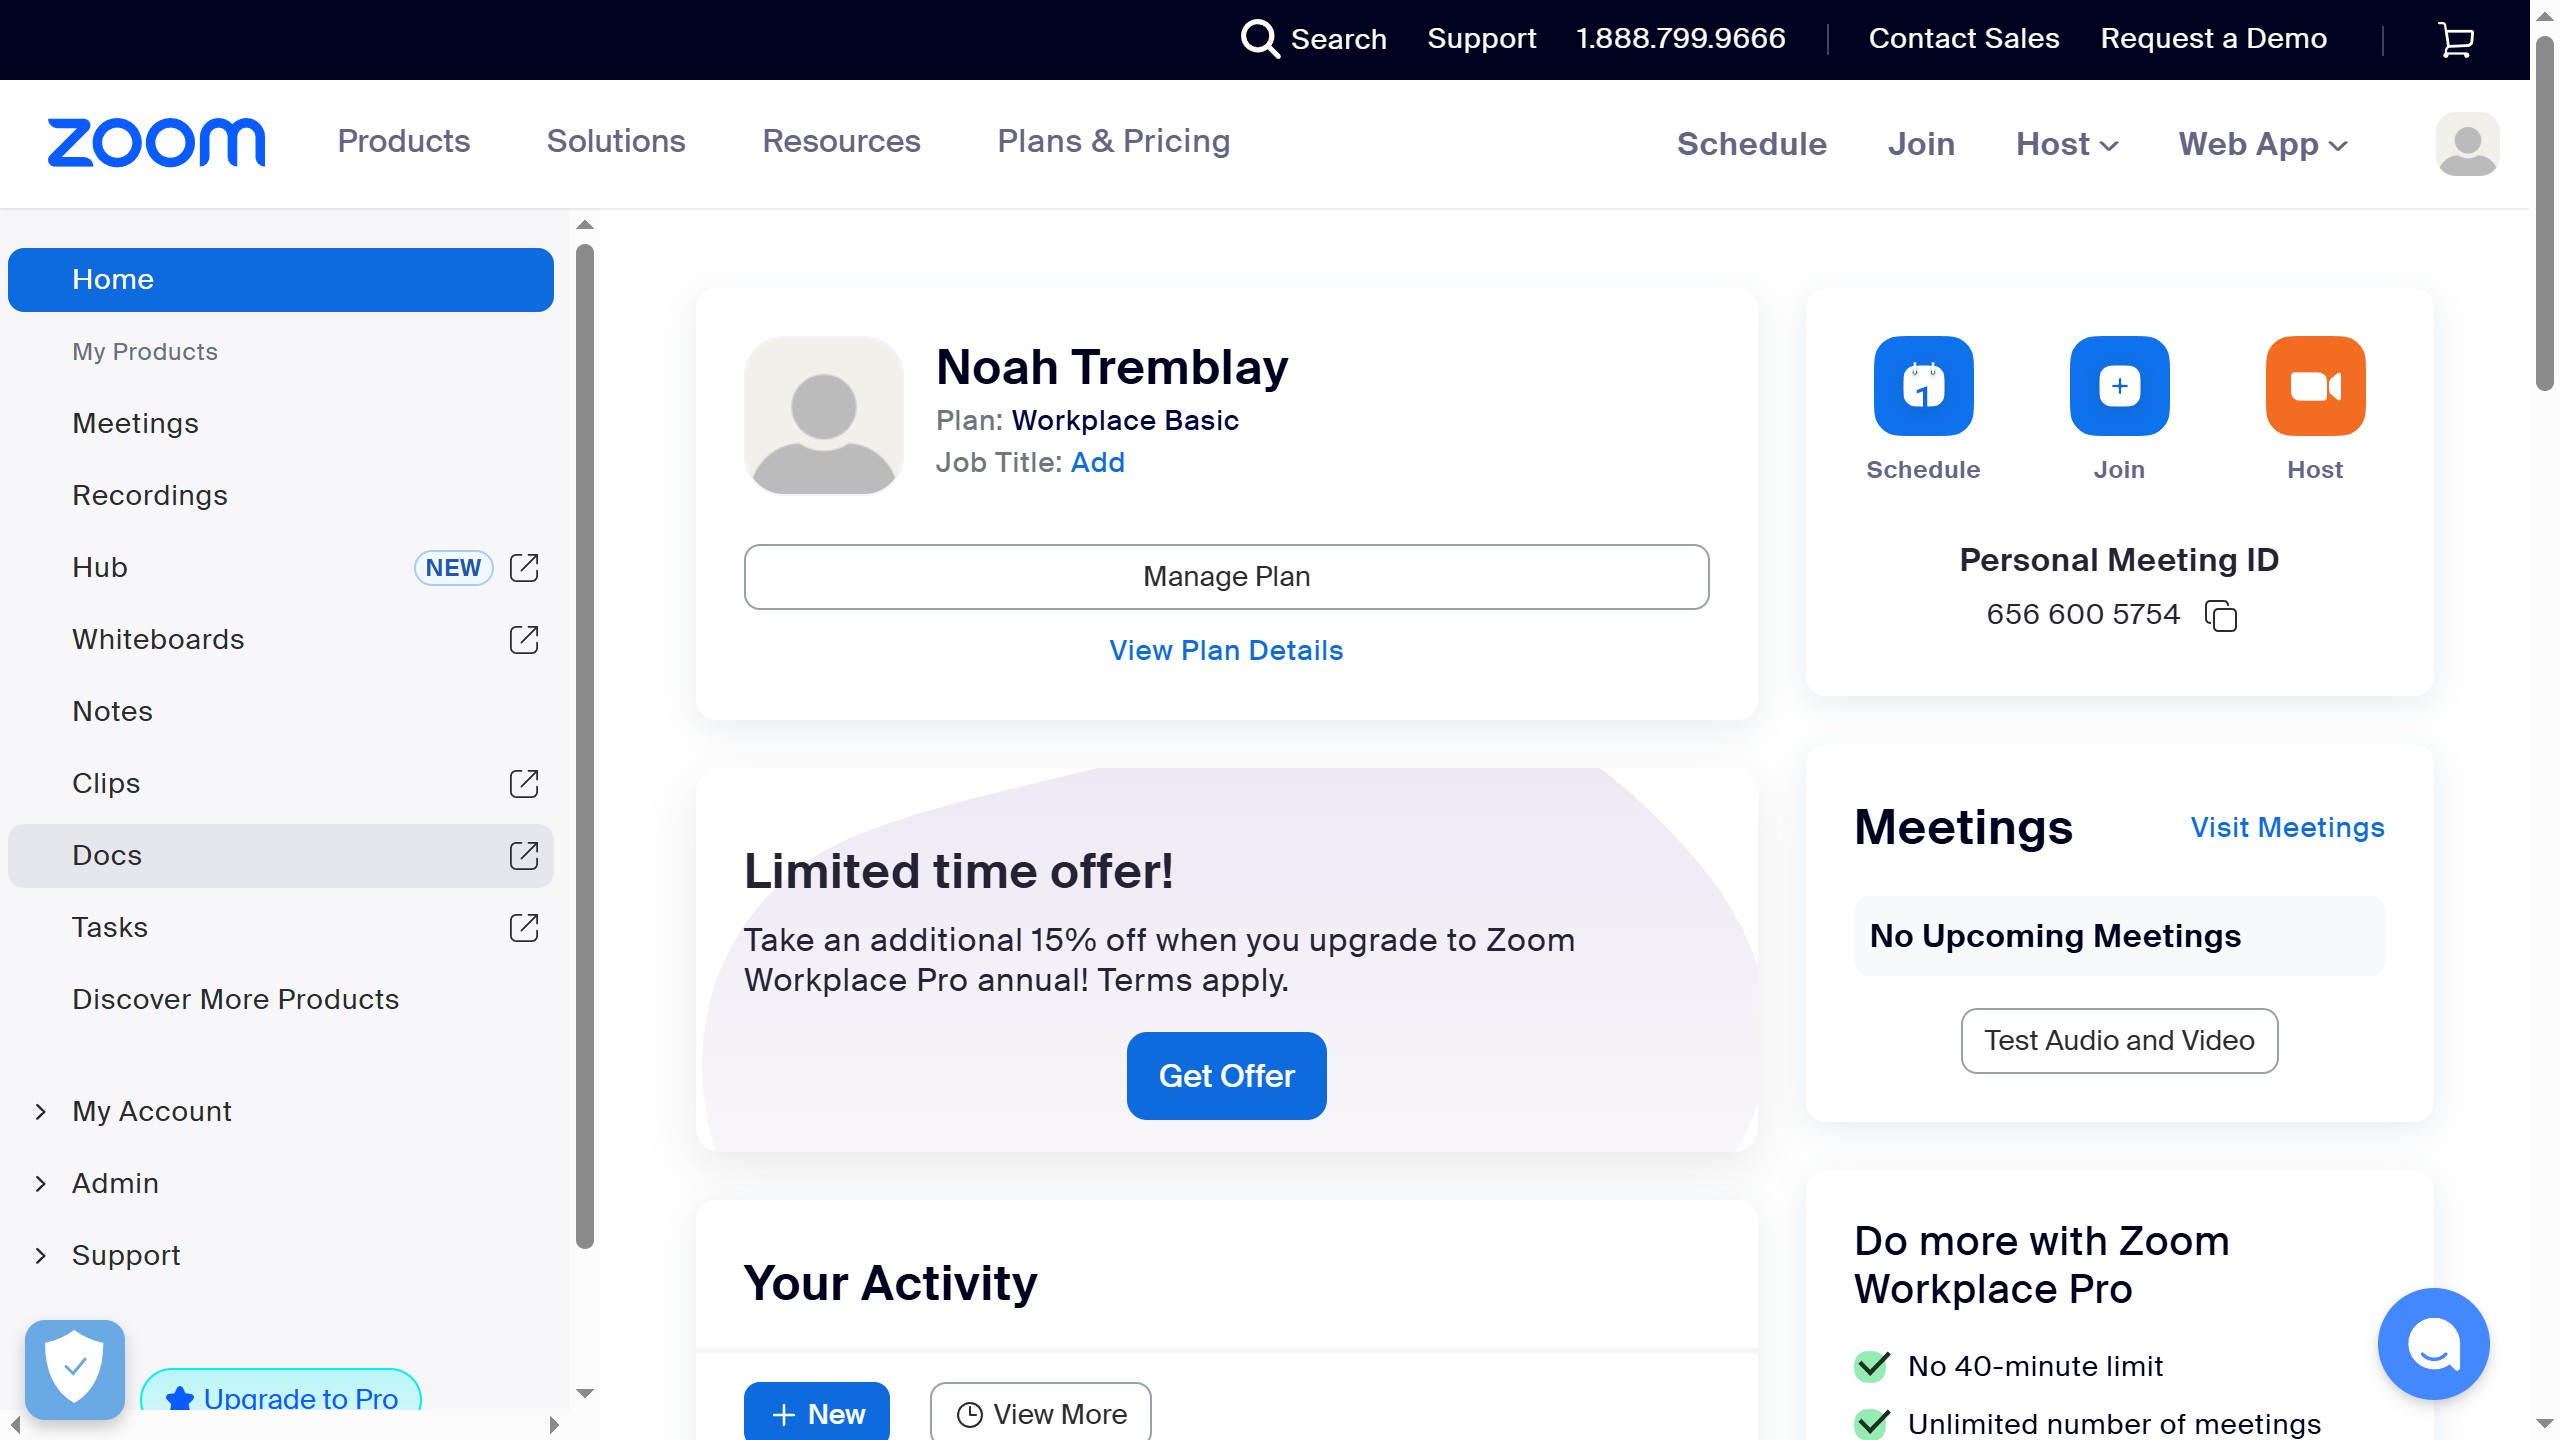
Begin by logging into your Zoom account. On the main dashboard, locate and click the 'Docs' option in the left-hand navigation sidebar. This will take you to your Zoom Docs page.
- Open Your Data Table Document
Once in Zoom Docs, browse your recent documents or folders to find the specific document that contains the data table you want to modify. Click on the document to open it.
- Locate the 'Add row' Option
After opening the document, scroll down to find your data table. At the very bottom of the table, you will see a button labeled '+ Add row'. This is the control for inserting new entries.
- Add a New Row
Click the '+ Add row' button. A new, empty row will instantly be added to the bottom of your data table. You can now begin entering new information into this row.
- Verify the New Row
Confirm that the new row has been successfully added to your data table. It will appear as an empty row, ready for you to input data into its respective columns.
Your turn to show how it works.
Build a walkthrough of your product with Saltfish, then share it with your customers.
Frequently Asked Questions
The 'Docs' option is located in the left sidebar menu of your Zoom homepage, below 'Clips' and above 'Tasks'.
 Zoom
Zoom
